How to Install a Minecraft Server
You have two options to host your own Minecraft server. You can either set up your own server on your local computer, or you can rent a server from online hosting providers by paying them a small monthly fee. Both options are suitable for players, but it depends on your own choice which type of server you want to set up. Many players think that creating a local Minecraft server is arduous and costly, but you only need the basic knowledge of networking and command-line interface.
- Download the Minecraft Java Edition
The first step to setup a Minecrft server is to download a Minecraft Java Edition, because if you have a console, pocket or Windows 10 edition of Minecraft then you will not be able to host a customized server. You can easily download the Java Edition from Minecraft official website.
- Download the Latest Version of Java
Once you have downloaded the Minecraft Java Edition, you also need to check that you have the latest version of Java installed on your local computer. Minecraft needs Java to run the game, and the latest version of Java will help your server to deliver the best performance. If you don’t have the latest version of Java installed on your computer, you can easily download it from the Java official website.
When you download the latest version of Java for Windows, you will get an .EXE file, which can be installed on your computer. Now restart your computer once the installation Java has completed. Now you are ready to set up your Minecraft server.
- Download Minecraft Server
You will have to download the latest version of Minecraft server. If you are using Windows operating system or Linux for your computer, you need to download minecraft_server.JAR file. After downloading the server file in .JAR format on Linux, you can run the file by using the following command.

A common practice is to setup a Minecraft server folder on the desktop of your computer. You can place the Minecraft server file in the same server folder on the desktop. When you double click on the Minecraft-server.jar file, it will extract the other files from the setup. You will have to check the end users license agreement. There is a eula.txt file extracted from the setup file. Open eula.txt in a WordPad and make sure that the last line is written as “eula=true”.
If you are using Mac operating system, you can download .jar file and place the file in a folder with a simple text file with the following text.
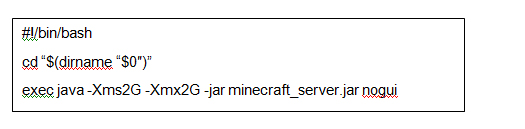
Save the plan text file as startmc.command, and place the file in the same folder where you have placed the server file. You will also have to grant permission to execute the startmc.command file.
- Connect to your Minecraft Server
Once you installed your Minecraft server, you can connect it from Minecraft on your local computer. You need to launch the Minecraft Java Edition and then select Multiplayer mode. A new window with several options will appear on the screen. Now click on the “Add Server” option, and enter your server details. You will have to enter your IP address, which you can find through Google. The Emerald World developers are here to help you learn what you need to know, so please drop us a line.
- Port Forwarding
After the main installation of a Minecraft multiplayer server on your local PC, you need to open up the access to your local computer through internet port forwarding. The setting for the port forwarding depends on the router and internet connection in use. Port 25565 should be registered as the standard setting. See more information about the Minecraft server types here.
Open the port forwarding in the router and enter the specific port number. In some cases a port range is needed, you can enter the same port number as both start and end points. Other players who want access to your Minecraft server, need your IP address and the server name. Once you share your IP and server name with your friends, they can connect to your server.
- Customization of Minecraft Server
You can also make some changes in the setting of your Minecraft world. You can make these adjustments from the server properties files. You can open these files through WordPad and change the text according to your requirements. As an administrator, you can control a lot of things including the number of players in the server, the difficulty level of the game, etc.
You can also ban other players to join your server by using the banned-player.txt and banned-ips.txt files. You will have to enter the IP address of the player that you want to ban. You also need to enter the username of those players who you want to grant access. You can enter their username in the white-list.txt file.